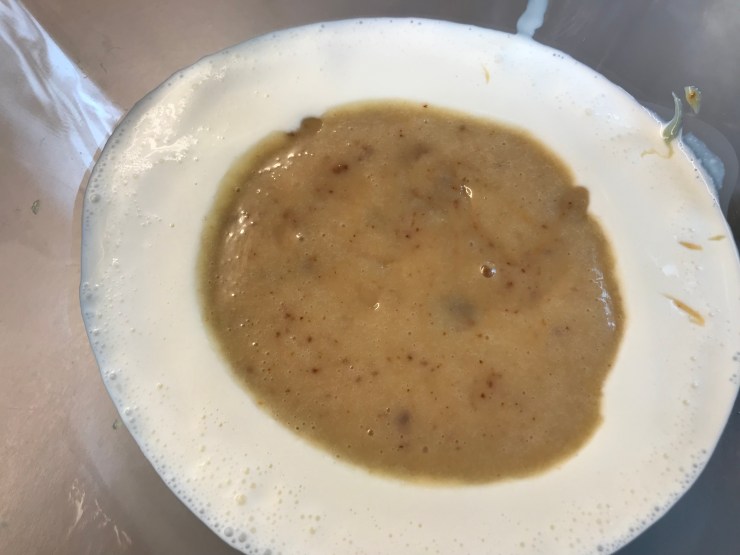
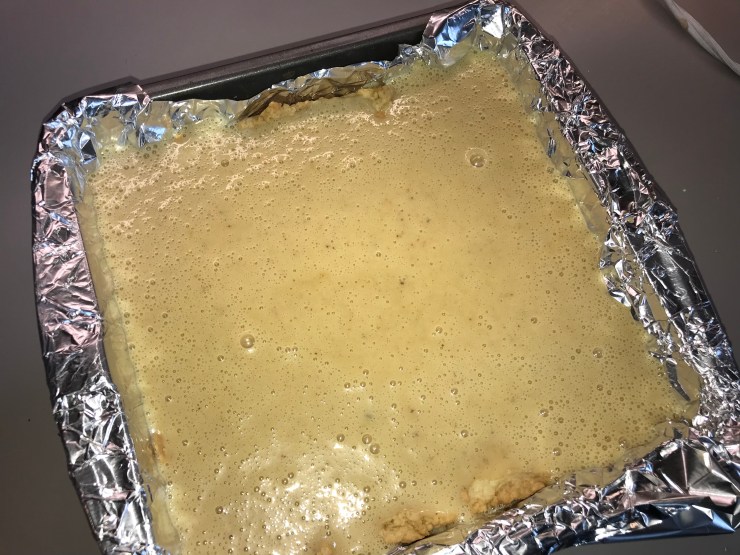
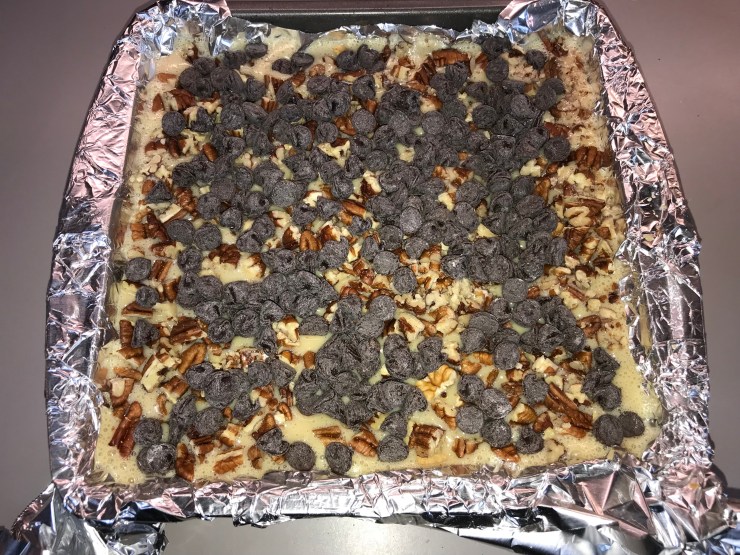
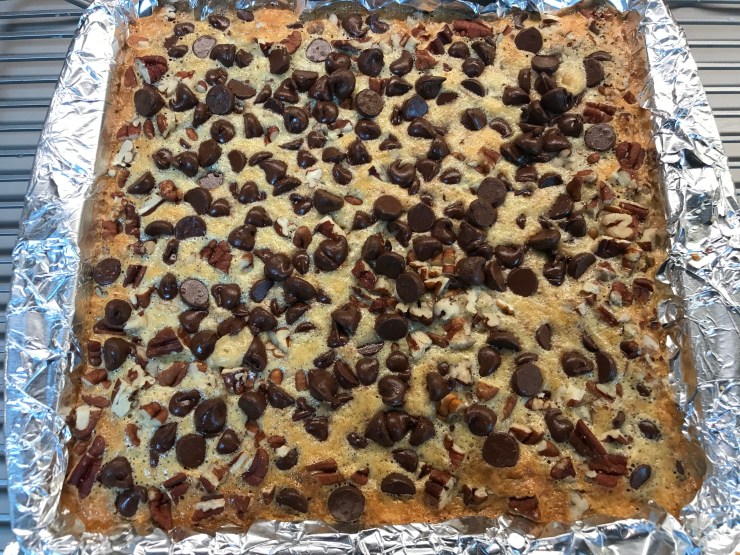
This is a great recipe for those friends with a particularly active sweet tooth. It does not lack for sugar, even though there’s less than half a cup of actual sugar in the recipe. The sweetness comes from the sweetened condensed milk, which you’re going to make into some caramel dulce goodness. Word of warning – if you’re going to make this recipe and, by the way, you should – this takes quite a while, mostly to turn the condensed milk into dulce de leche. The good thing is, you can do it in phases. Make the dulce de leche in one sitting and then put everything together to make the bars in a second sitting, which can even be the next day. Oh, and by the way, “dulce de leche” is just a fancy foreign term for something that is just like caramel, but isn’t quite caramel J First thing you’re going to do is make the actual dulce de leche. As I said above, this will take a while but you can do it a day ahead of time. Fill a large pot with water (about ¾ high) and put it on the stove. Take the label off the can and toss it – do not open the can. Next, place the can in the water. You might want to place it on its side rather than straight up because it might bounce around if it’s standing. Make sure the water is at least a half inches above the top of the can. It can be more than that, but no part of the can should ever be uncovered. Turn on the stove and bring the water to a low boil, then reduce it to low, so that the water is simmering. You’re going to leave the can simmering for two and a half hours. If you do it for longer, the color will get deeper but it’ll also be harder to work with. Two and a half hours should do you just fine. Normally here is where I’d tell you to go do something else, grab a beer, play tennis, whatever. And you totally can do that, but one thing to keep in mind – you need to be careful and watch the water as the can is in there. Don’t let the water drop below the top of the can – make sure the can is covered at all times. If the water level starts getting close, just pour in some more hot water. If you don’t there is a chance that the can could explode and You. Do. Not. Want. That. I can’t be clearer: exploding = bad. Avoid it. After two and a half hours, remove the pot from the heat and take the can out of the water using a pair of tongs. Do NOT open the can – it’s been in very hot water for quite a while and if you open it now it could splash hot liquid on you. Tasty liquid, to be sure, but it won’t be any fun. Let the can cool to room temperature before opening it. Here’s where you can go do whatever the heck you feel like doing without worrying about exploding cans. Ok, Day 2: the actual bars. Here, take a 9 inch square baking pan and line it with foil (as always, for much easier clean-up). Chop up the butter into small pieces and add those pieces along with the 2 cups of flour, powdered sugar, vanilla, egg and salt into a bowl and mix until everything is well blended. You’ll definitely need your hand mixer for this and it will probably take a few minutes because you really want to break down all the butter pieces. Put the dough into the prepared pan and press it down with your fingers so that it’s evenly spread. Bake it at 350 until it gets a nice little brown color to it, about 25-30 minutes. Remove it from the oven (don’t turn the oven off – this baby is going back in) and cool it on a wire rack while you mix the next set of ingredients. FYI, it doesn’t have to be 100% cool to go back into the oven. 5-10 minutes out of the oven will be plenty. NOW open your can of what is now dulce de leche. And here…I have a confession. I simmered for two and a half hours and when I opened the can later I wasn’t happy with the color – it was still too light. But I’d already opened the can so what was I supposed to do? This is one of those moments when you kind of just have to give something a shot to see if it works. So…I poured the liquid into a small saucepan and put it on low heat, stirring pretty much constantly. Within about five minutes, the liquid started getting darker. Additionally, as I stirred some of the condensed milk stuck to the side and browned, so you can see little darker bits in the liquid and I have to say, I don’t hate it. I had already poured the heavy cream into the bowl, so I poured the dulce de leche in the middle of it – that’s what you’re seeing in the picture. Also add the egg yolks, the 1 T of flour and the additional couple t of vanilla. Mix that together until it’s smooth and pour it over the crust. Evenly cover the dulce de leche mixture with the chocolate chips and pecans and put the pan back into the oven for another 25 or so minutes, until it’s just a little soft in the center. Take the pan out of the oven and let it cool on a wire rack and you are done! And for me, it was a good lesson that even if things don’t go exactly as you planned them (and how often does THAT happen?), you can often salvage what you’ve got into something really delicious.
Ingredients
Directions


- Comment
- Reblog
-
Subscribe
Subscribed
Already have a WordPress.com account? Log in now.
