So, I told her I wanted to bake something for her. She told me her son loves cupcakes and chocolate, so that made things a lot easier. And, since it is June and therefore Pride month, I thought maybe a little rainbow icing on top might be just the thing!
Ingredients
- 1 cup flour
- ¼ t salt
- ¾ t baking soda
- ½ t baking powder
- ½ cup boiling water
- 1/3 cup sweetened cocoa
- ½ cup butter, softened to room temperature
- ¾ cup sugar
- 2 t vanilla
- 1 egg
- 1 cup butter, softened to room temperature
- 3 ¼ cups powdered sugar*
- 2 t vanilla
- ¼ t salt
- 2 – 3 T milk*
- Food coloring
- These are approximate – the idea is to get the icing to a consistency that’s fairly firm so you can work with it.
Cupcakes
Frosting
Directions
Ok, cupcakes first. Whisk together the dry ingredients – flour, salt, baking soda and baking powder and set that aside.In a small bowl, mix the boiling water and the cocoa until the cocoa is dissolved and set that aside as well.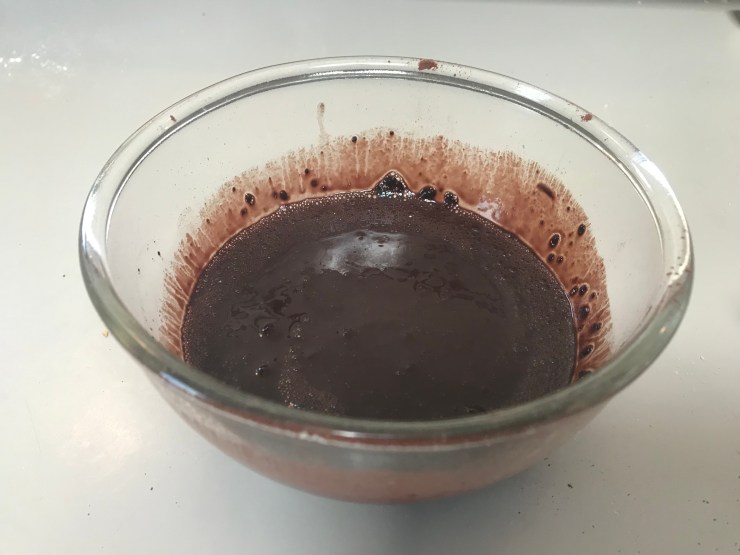
In a large bowl, beat the butter with your hand mixer until it’s nice and fluffy. Add in the sugar, vanilla and egg and beat until it’s well blended.
Add in half the flour mixture then beat until blended, half the cocoa mixture and beat that until it’s well blended, then repeat with the other halves until you’ve got your batter. Pour the batter into a muffin tin lined with cups. Bake at 350 for about 20-25 minutes – until you can insert a toothpick and it comes out clean.


Remove from the oven and cool the cupcakes on a wire rack. Don’t leave them in the pan too long – take them out as soon as they’re cool enough and leave them on the rack to cool completely.
On to the icing!
The icing itself is super easy to make. Getting the rainbow effect takes a little work, but it’ll be fun and worth it (hopefully!).
There are actually multiple ways to get the rainbow icing effect, most involve having to use multiple piping bags, though. The way I did it is a little messier and not quite as precise, and it should do the trick if you do it right. I did not.
If you have access to multiple piping bags, a quick internet search will lead you to other ways to do it. It won’t change the recipe part (you can definitely use this one!), just the application.
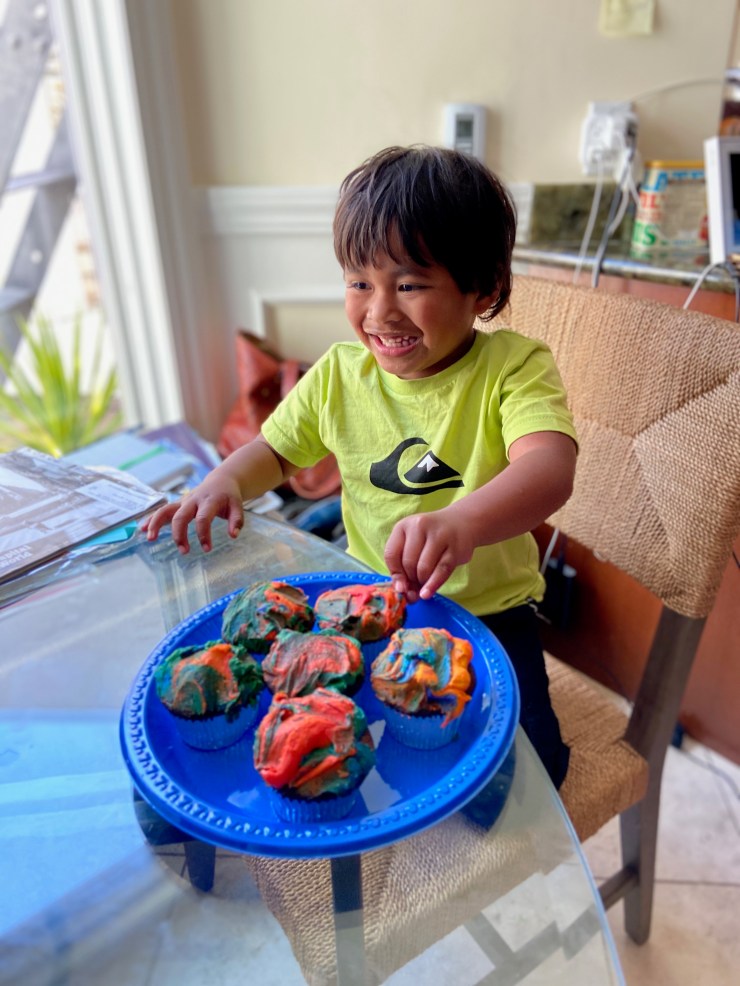
That said, based on how they turned out, I definitely do NOT recommend my method. I mean, I’m not mad at how they turned out, but this is absolutely not the look I was going for. I wanted more discreet lines between the colors, and my final product is…well, more psychedelic. But hey, if you screw up, figure it the f..k out, which is just what I did and I actually like these.
That said, if you want the more discreet lines of a rainbow…use more than one piping bag. Just sayin’.
Anyway, like I said, great buttercream is super easy to make. Put the butter into a bowl and mix with your hand mixer for about 3 minutes, until it’s light and fluffy. Next, add in the powdered sugar, salt and vanilla – hold off on the milk. Mix until well combined.
Here’s where the milk comes in. Basically, that’s to get the frosting to the consistency you want. The more milk you add, the softer your frosting will be.
Be careful, because you want it fairly firm because you need to put it in a piping bag and, well, liquid frosting just doesn’t work in this case. If you DO add milk, add it in very small increments – a little goes a long way. If you find – oops, I added too much milk – just add more powdered sugar to get it to the consistency you want.
Once the icing is done, we’re going to make a little bit of a mess. Get out 6 or 7 small bowls and separate the icing into roughly equal portions. 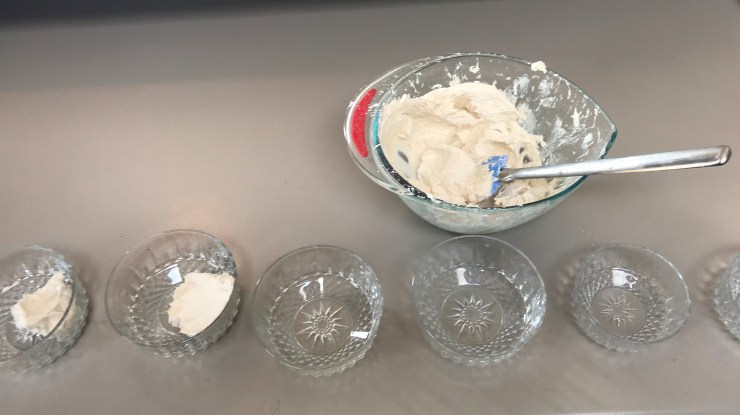 Take your food coloring and make each bowl a different color of the rainbow. I used fancy Wilton brand colors which are pretty vibrant, but you can pretty much duplicate most colors with the simple food coloring you get at the grocery store.
Now the tricky part. Get your piping bag out and, with a spoon or small spatula, place one color in a strip along the side (this is why you want your frosting fairly firm – you want it to stay where you put it). Follow that with the next color, and then the next, until you’ve got 6 or 7 color strips in your bag.
Try to get them in discreet lines, but don’t be concerned if they overlap a little – it’s all going to mix together anyway.
Squeeze the bag from the top and frost your cupcakes, pressing from the top down and swirling the tip of the bag as you go.
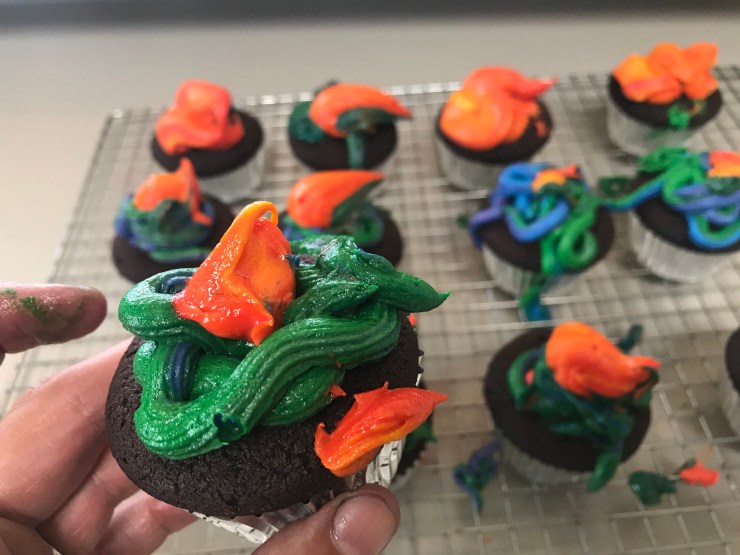
As you can see, mine didn’t turn out particularly neat. I realize that’s COMPLETELY on brand for me, but I honestly really was trying to make these pretty. So, what to do? I took a knife and lightly swirled everything together. The final product is more Haight Ashbury than rainbow, but I kinda like them. 
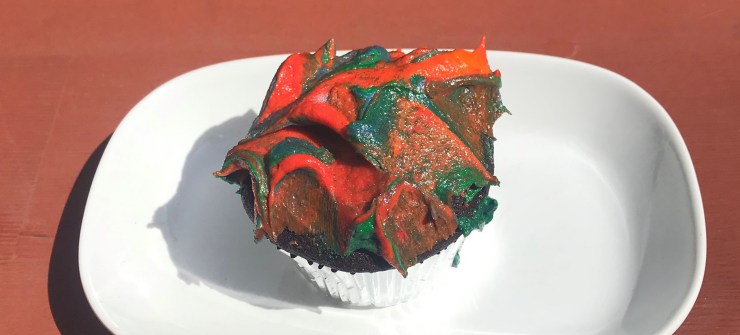
And there you have it – chocolate cupcakes with festive rainbow icing! Makes a dozen tasty, colorful cupcakes. And even though they visually didn’t turn out how I wanted them to – not even close – they ARE super delicious.

1 thought on “Chocolate Cupcakes with Rainbow Frosting”