Back in the 1940’s, this cake was invented at a bakery/soda fountain chain called Blum’s. Apparently, it was one of those “happy accidents” where their baker made candy too hard for what they were planning to use it, so they repurposed it into something that turned out to be pretty special. It was apparently the cake back in the day.
Based on a little research, it seems that there are now multiple variations of Blum’s Coffee Crunch Cake out there. I suspect the actual original recipe might be lost, but these all are in a similar vein. I played with them, and this is what I came up with.
They’re right, though – it is definitely something special.
Ingredients
Coffee Crunch
- 2 ¼ cups sugar
- 1/3 cup strong brewed coffee
- 1/3 cup corn syrup
- 1 ½ T baking soda
Cake
- 1 ¼ cups flour
- 1 ½ cups sugar, separated
- ½ t salt
- 6 egg yolks
- 3 T water
- 2 T vegetable oil
- 8 egg whites (separated from the egg yolks)
- 1 t cream of tartar
- 1 ½ t vanilla
- 1 T lemon juice
- 1 t lemon zest
Whipped Cream Frosting
- 2 ½ cups heavy cream
- 2 ½ T sugar
- 3 t vanilla
- 2 t instant coffee granules
Directions
We’ll start with the candy crunch. It’ll go on the cake last, but we make it first to let it cool and get it out of the way. You can make this a week or more ahead of time if you’d like.Ok, first get a baking sheet and line it with aluminum foil. Oil it up pretty heavily with a non-flavored oil (no olive oil here). Set it aside.
Next, measure out your baking soda and have it ready near the stove.
Now, get out a big pot, at least 4 quarts, preferably even a little larger. Add in the sugar, coffee and corn syrup and cook over a medium-high heat, stirring occasionally, until it begins to boil. Continue cooking (and occasionally stirring) until the temperature on a candy thermometer reads between 270 and 280 degrees. Figure this can take up to 10 minutes, so be patient.
Once you’ve hit the temperature you want, take the mixture off the heat and immediately add in the baking soda, stirring vigorously. Caution here! Adding the baking soda is going to make the mixture foam up something fierce – it’s actually super cool. At least I thought so, but maybe that’s just me.


It took a couple seconds for the baking soda to do its thing, but once it did, wow. Anyway, stir it in completely and then, while it’s still foaming, pour it directly onto your prepared baking sheet. Don’t spread it out, just let it lay in the poured clump.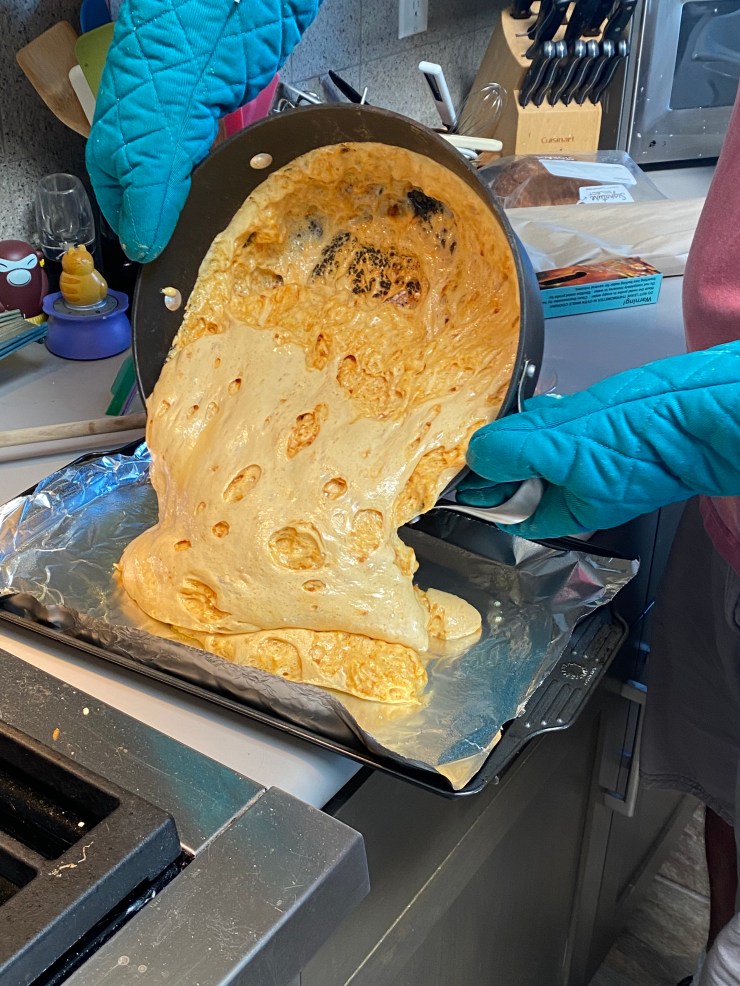
Let the mixture cool undisturbed on the baking sheet for at least an hour, or until it’s completely cool.

When it’s cooled, you’re going to want to crush the crunch into small coin-sized pieces. This is actually easier than it looks. The slab looks pretty strong, but resist the temptation to just break it in half over your knee. It’s just honeycomb and if you do that, you’re going to get candy dust EVERYWHERE.
I mean, not that I did that or anything. But I may have done that. I didn’t take a picture because my one and only thought at the time was that I made a complete mess and I need to clean it up. Right. Now.
Just take a rolling pin and roll it over the slab. You won’t have to press too hard.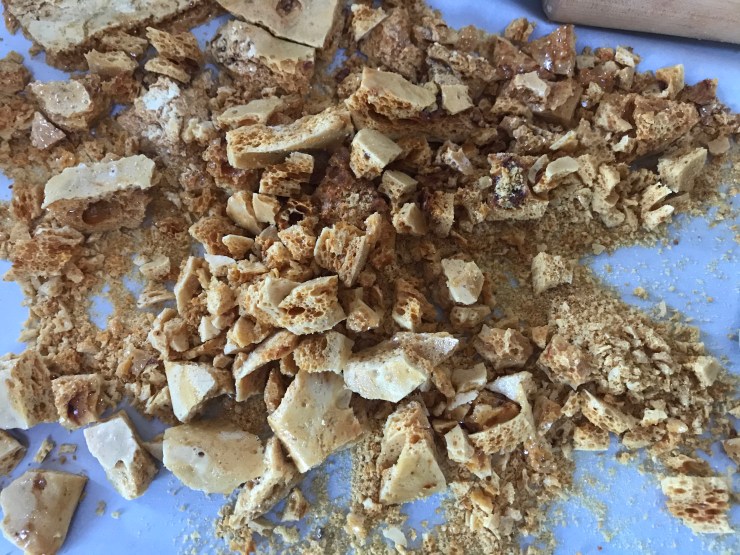
Store the cooled crunch in an airtight container until everything else is done.
On to the cake. Butter and flour a 9” springform pan and set that aside.
Whisk together the flour, ¾ cup of sugar and the salt and set that aside.
In a separate bowl, beat the 6 egg yolks and ¼ cup of sugar with your hand mixer until the mixture thick, just a couple minutes. Next, add in the water and vegetable oil and mix again until the mixture is thick, another 3 or 4 minutes. Set this bowl aside as well. Yes there’s a lot of “aside” here.
In another bowl, add the egg whites and mix with your hand mixer until they’re frothy. Add in the tartar and continue mixing until you get soft peaks. Then, add in the remaining ½ cup of sugar and mix again into thicker peaks form – figure a couple minutes here.
Set aside your hand mixer and whisk in the vanilla, lemon juice and lemon zest until just combined. Put away your whisk. Then, get your yolk mixture and gently add that in and fold it in with a wooden spoon.
On to the flour mixture. Gradually (and gently) fold the flour mixture into your wet mixture, a cup or so at a time until everything is just combined.
Get out your prepared springform pan and pour the batter in. Smooth the top with a spatula and bake at 350 for 55 minutes or so, until it’s a nice golden brown and a toothpick inserted in the middle comes out clean.


Place the cake on a wire rack and let it cool completely while it’s still in the pan.
When its cool, gently remove the cake from the pan. If you’re not ready to frost it, wrap it in plastic wrap and refrigerate it until you’re ready for it.
Finally, the frosting, which is the easiest of the steps.
Add the whipping cream, sugar, vanilla and coffee granules into a bowl and whip with your hand mixer until stiff peaks form.
Now you’re ready to put everything together. Take the cake out and cut it in half. Take the bottom half and place it on a serving plate.
Take just under half the frosting and frost this first layer. Sprinkle about a cup of the coffee crunch on top, and then take the second half of the cake and place that over it. 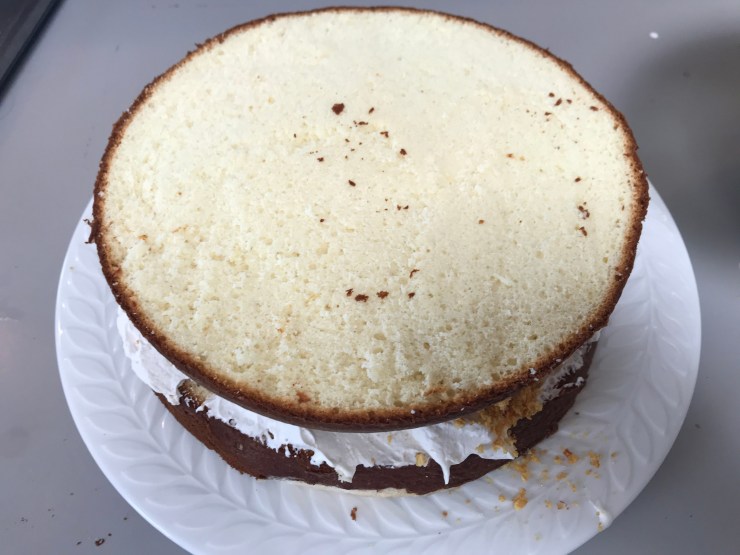 For this one, place the domed side down (this way, you’re frosting a flat surface). Frost the top of the second layer, and then with any leftover frosting coat the sides of the cake. Take your remaining coffee crunch and sprinkle it on top and around the sides.
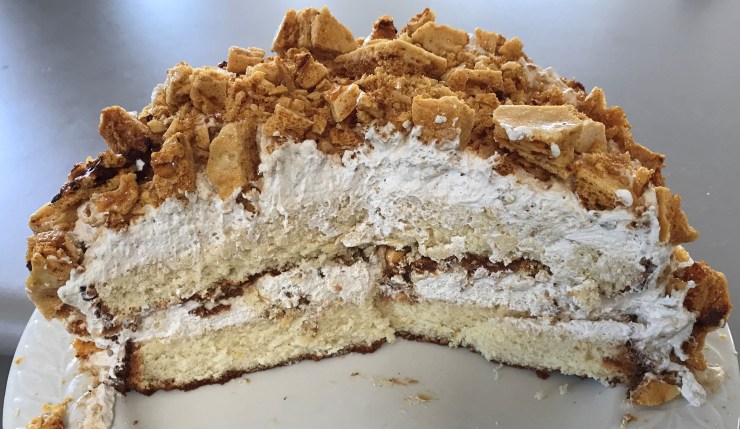

Most recipes I read said that this cake is best enjoyed the day it’s put together. I agree that’s true, but it’s still damn good a up to three or four days later – just be prepared that the crunch part in the middle will be a little less “crunchy” after being surrounded in whipped cream for a few days. But it’ll still be incredibly tasty!

Sounds delicious! I think there is a typo in the directions. It says to fold egg yolks in with a wooden spoon. I think you mean fold in beaten egg whites with a wooden spoon. Must try making this!
LikeLike
No, I think it’s right (I’ve made a lot of errors, but I think I’m right here!). You’re folding the egg yolk mixture into the egg white mixture. Though I guess you could do it the other way, too 🙂
And please do try making this!! It’s a lot of work but wow is it fantastic – definitely one of my favorites!
LikeLike